At present, in most projects, regardless of their size, the installation of aluminum profile LED lights is carried out. Besides their ability to emit light, these products also serve as decorative items, creating excellent focal points for interior design. So, what are the design steps? How much does the installation cost? Let’s find out more below.
It is important to note that, for these products to function at their best, they must be installed correctly and in accordance with the technical standards. Proper and technically sound installation enhances aesthetics and elevates the living space, making it more beautiful and impressive.
However, to achieve this, consider the following:
The installation area should be able to dissipate heat quickly, avoiding the build-up of heat, which can affect the durability and lifespan of the lights. When installing, also choose suitable positions to facilitate cleaning, maintenance, upgrades, or replacements in case of malfunctions.
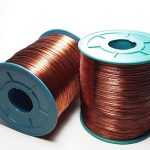
Learn more: What is aluminum profile?

During the installation of shaped aluminum LED lights, the following steps will be involved:
On the current market, there is a wide variety of aluminum profile LED lights available in different shapes and sizes. Depending on your specific needs, you can choose the type of LED light that best suits the intended purpose, ensuring both functionality and aesthetic appeal.
For example: Use small LED strips to illuminate shelves, large LED strips for recessed ceiling and wall lighting, V-shaped LED profiles for corner illumination, etc.
Depending on the space where you intend to install the lights, you can choose one of the following two design methods:
Installing the LED lights into the aluminum profile first and then fixing them.
This method is suitable for locations that are hard to access or where fixing the aluminum profile before installing the LED strips is more convenient. It is also commonly used when surface-mounting LED lights on walls or partitions.
This approach is suitable when you have already fixed the aluminum profiles in decorative shapes like squares, triangles, Z-shapes, or extended lengths. In such cases, it is necessary to first secure the LED profile and then install the LED strips.
You will need the following tools and equipment:

The detailed installation process of shaped aluminum LED lights is as follows:
Begin by measuring the locations where you intend to install the lights. This measurement will help determine the quantity of aluminum profiles required.
Additionally, plan ahead for the placement of power sources to ascertain the number of electrical wires needed to connect to the power source.
Precisely mark the aluminum profile at the intended installation location using a marker. To avoid losing the mark and reduce aluminum shavings during cutting, you can apply masking tape over the marked area.
Use a cutting machine or a fine-toothed saw to cut the aluminum profile according to the marked location.
Note: After cutting, there may be excess aluminum burrs. It is advisable to use a file or sandpaper to smoothen the edges.
Measure the required length and then cut the LED light strips accordingly (or extend them if needed) to match the size of the aluminum profile.
Caution: Before cutting the LED strip, make sure to measure accurately and mark the cutting position to avoid any misalignment.
Use wire cutters or wire strippers to strip about 3mm of the wire insulation. Then, use a soldering machine to connect the wire ends to the remaining terminals on the LED strip. When soldering, consider using a combination of solder and heat-shrink tubing to ensure a secure connection for each joint.
To prevent electrical leakage and ensure safety, wrap the soldered connections with electrical tape.
Afterward, connect the wires to the power source and test the lighting. If the LED lights function correctly, you can proceed to the next step.
Two scenarios can occur when mounting the aluminum profiles:
a) For recessed or concealed mounting into ceilings or walls, apply masking tape on both sides of the groove before attaching the aluminum profile. This prevents excess sealant from spreading onto the exterior surface through the groove.
Apply specialized adhesive (e.g., Tbond, Xbond, Silicon) into the groove.
Carefully insert the aluminum profile into the groove, ensuring it adheres firmly.
While waiting for the adhesive to dry, temporarily secure the aluminum profile by adding an additional layer of masking tape on the surface.
b) For surface-mounted aluminum profiles with mounting brackets, position the mounting brackets where you intend to install the LED lights. Mark the locations with a marker.
Use a drilling machine to create holes and then secure the mounting brackets firmly to the surface with screws.
Note: For surface-mounted LED lights, attach the LED strip inside the aluminum profile first, then add the necessary accessories before securing the aluminum profile in its designated position.
Learn more: What is LED Aluminum Profile? Characteristics, Composition, Quotation

Once the aluminum profile is securely in place, double-check it and clean any dust or debris inside the channel if necessary.
Then, peel off the adhesive backing and attach the LED strip inside the aluminum channel.
Note: If the channel is only wide enough for a single row of LED strips, ensure that the LED strip is positioned in the center. If you are using 2 or 3 LED strips, evenly space them to avoid electrical shorts or overheating.
Insert the end caps into the ends of the aluminum profile. The purpose of end caps is to prevent insects or dust from entering the inside of the aluminum channel.
Next, measure, mark, and cut the diffuser cover to fit the dimensions of the aluminum profile snugly. You can use scissors or a cutter to trim it for a neater appearance.
Then, gently press the diffuser cover onto the aluminum profile.
Connect the LED light wires to the power source once more to ensure the system operates smoothly.
Caution: It is advisable to securely fix the power source in dry, well-ventilated areas for easier maintenance and repair. Avoid damp locations as they pose a risk of electrical short-circuiting or damage caused by rodents.
After completing the installation, clean any remaining dust or debris. Remove any masking tape, protective film, or protective tape from the diffuser cover, and you are finished.
Learn more: LED aluminum profile sizes

The pricing for LED aluminum profile installation varies depending on factors such as location, the quantity needed, ceiling height, aesthetics, light output, and more.
Here is a breakdown of how the pricing for LED aluminum profile installation is calculated:
Furthermore, the pricing may vary among different installation companies, types of LED aluminum profiles, sizes, and specific requirements. Therefore, it is advisable to contact reputable installation companies to obtain the most accurate quotations based on your specific needs at any given time.
We hope that with all the information provided here, customers will have a more detailed understanding of how to install and execute LED aluminum profiles. As a result, users will enjoy a well-lit space of high quality and safety.
For more detailed information, please contact us using the information below:
Address
Website: https://stavianmetal.com
Email: info@stavianmetal.com